Vim: Window Splits
Learning to create, navigate in Window splits in Vim

I am a Student, self-taught web programmer, Linux and Vim Enthusiast. I like to try out and experiment with new technologies and programming languages.
Introduction
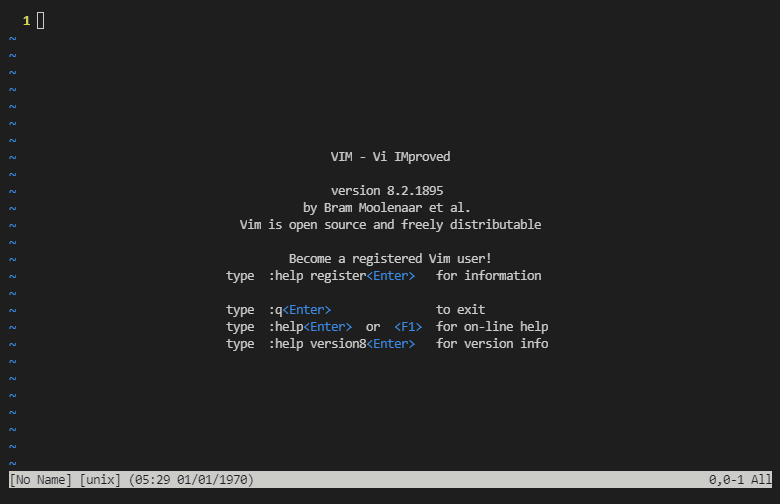
Have you ever been stuck in Vim opening multiple files within a single window? Didn't anyone tell you, you can create multiple windows and split them within a single tab. Definitely, the window splits will be in separate buffers. In this way you can create multiple windows inside of a single Tab, what are Tabs? You can learn some basics about it from my previous article about Tabs in Vim. We can either create Vertical or Horizontal splits within the window making it flexible to work with multiple files in Vim. This article will look into the creation, navigation, closing, and rearrangement of Window Splits.
Creating a Window Split
Creating Window splits is quite straightforward. You should keep in mind the following things though:
- You can create a horizontal or a vertical split within a window.
- Creating a Split either vertically or horizontally can shorten the current window's size, making it equally spaced.
Let's take a look at creating the vertical and horizontal splits one by one:
Vertical Splits
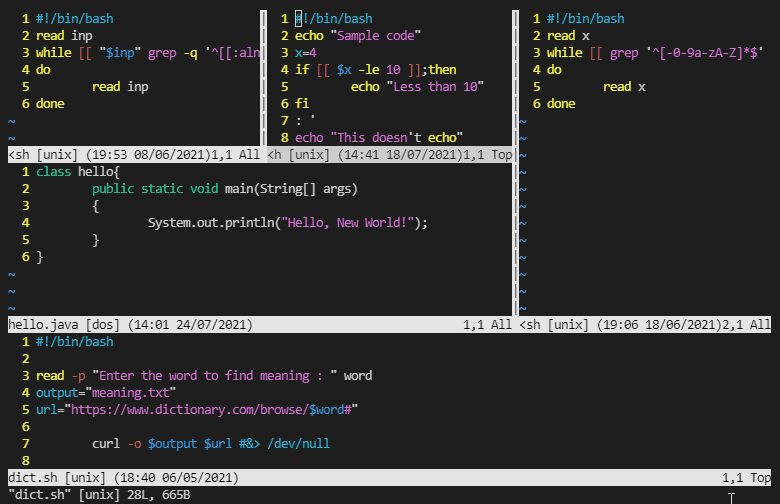
Vertical Split as the name suggests, it will split the current window into two halves vertically or a standing split between two windows.
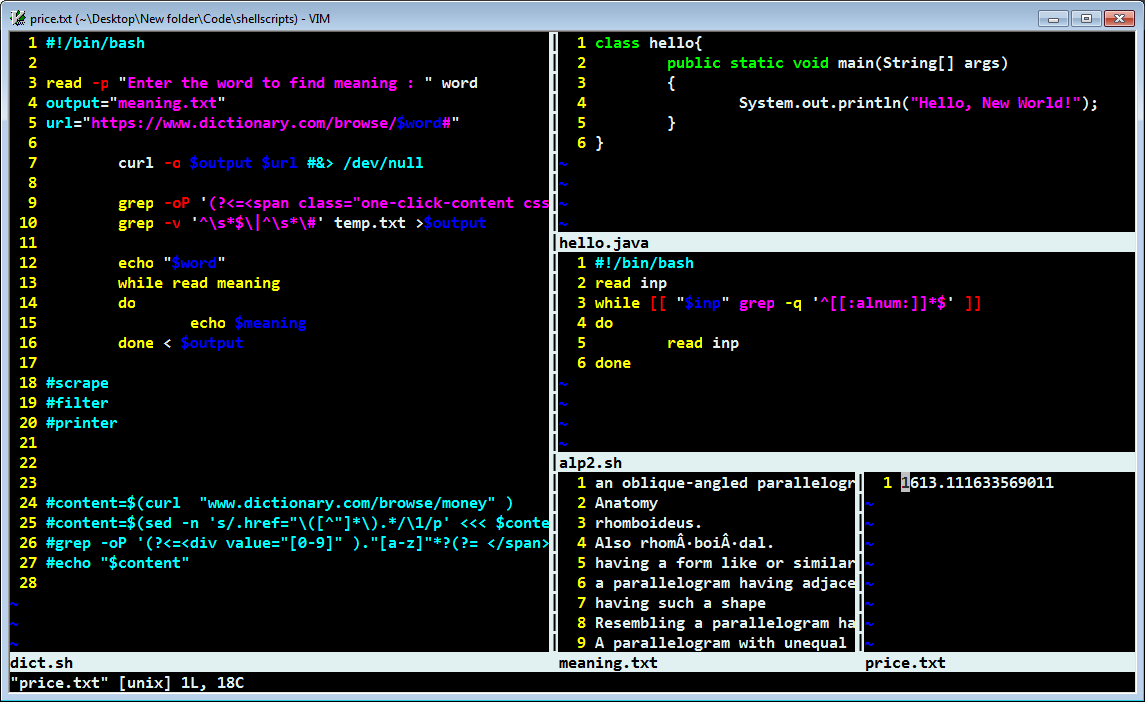
The below image clearly shows a vertical split between two windows. Here we are splitting a single window into two windows. We can also think it of in splitting the window from left to right.
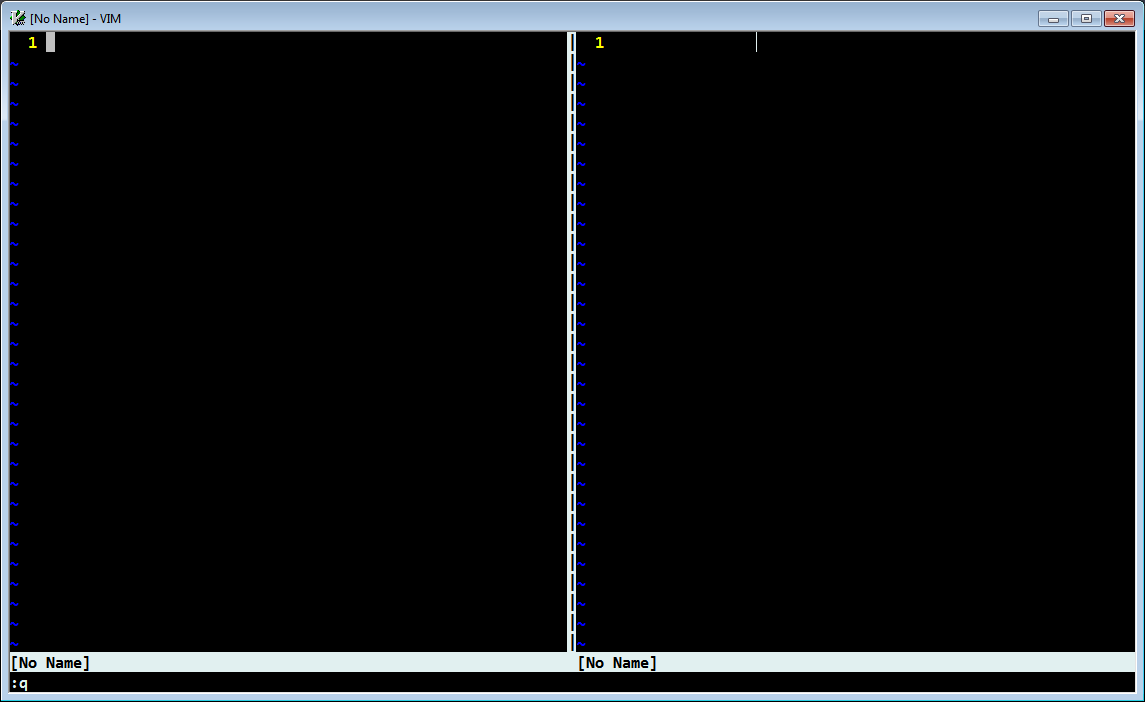
To create a vertical split, you can use :vsp or :vsplit to create a split of the same file/ blank file.
If you already have a file open, it will open the same file in the split as long as you don't specify which file to open. You can specify the name of the file after the command :vsp filename or :vsplit filename
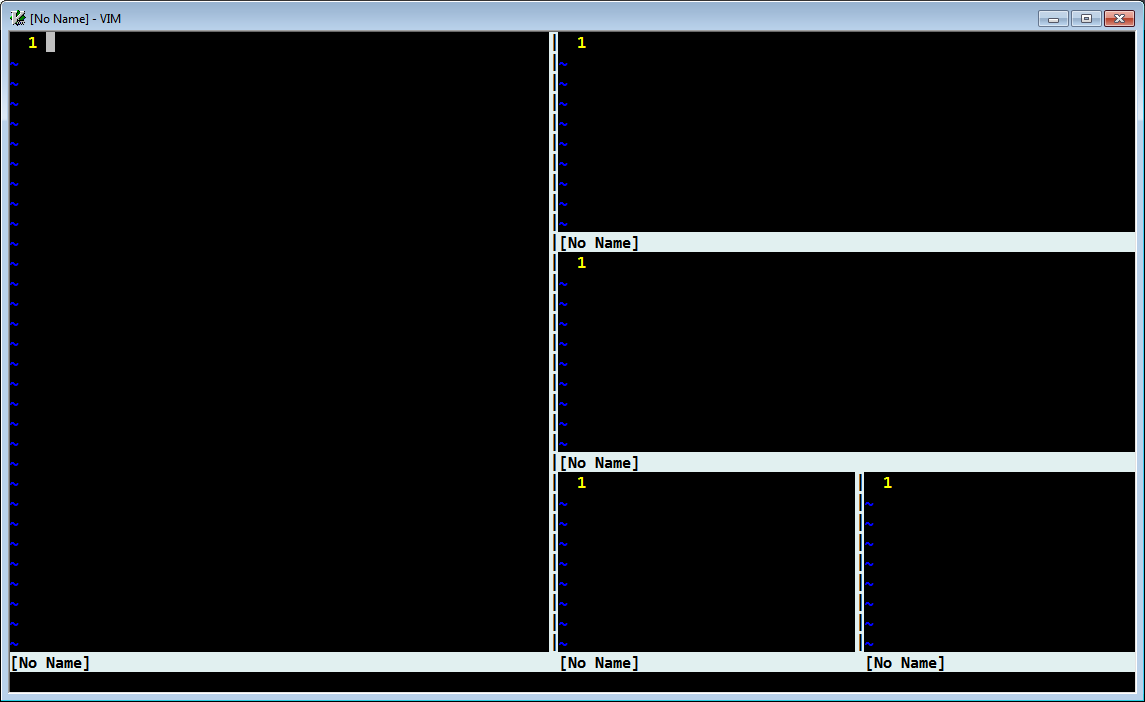
It's not like that you can create only a single split, you can create multiple vertical splits. That can get pretty wild pretty quickly.
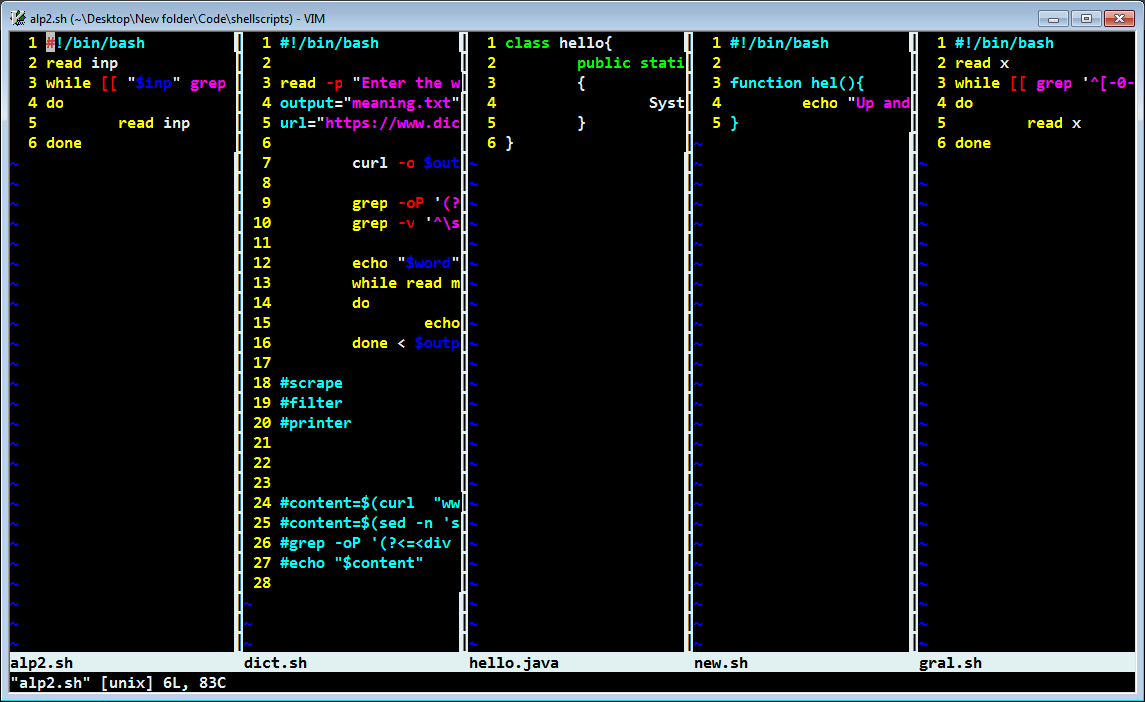
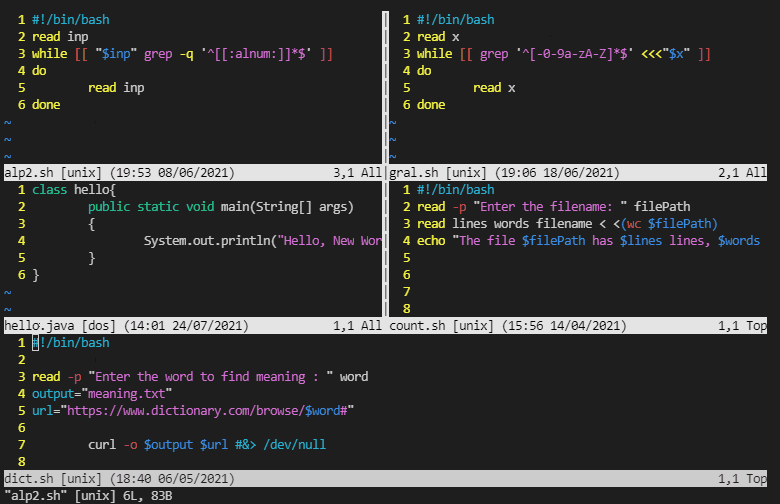
In the above screenshot, I have created 5 vertical splits from a single window, so making them equally wide and evenly spaced. This might not be useful every time but can get quite handy in some tricky situations.
Horizontal Splits
Similar to Vertical splits, we have horizontal Splits indicating to split from top to bottom. We can split a single window into two halves horizontally or a sleeping split between the windows.
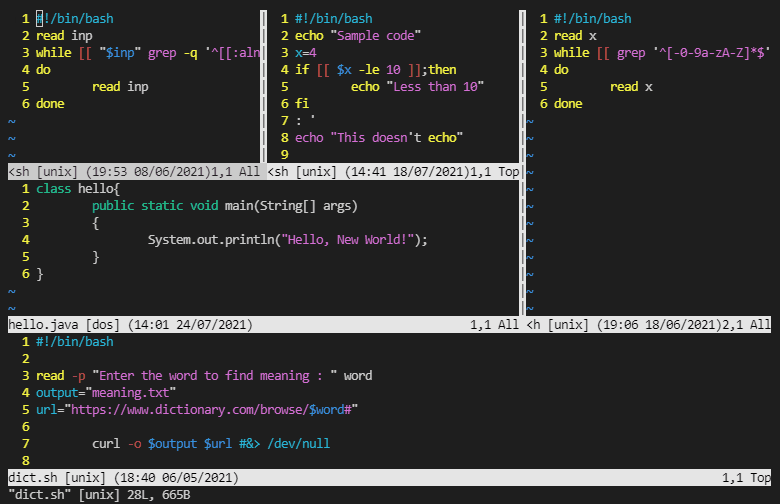
The below image clearly shows a horizontal split between two windows. Here we are splitting a single window into two windows. We can also think it of in splitting the window from top to bottom.
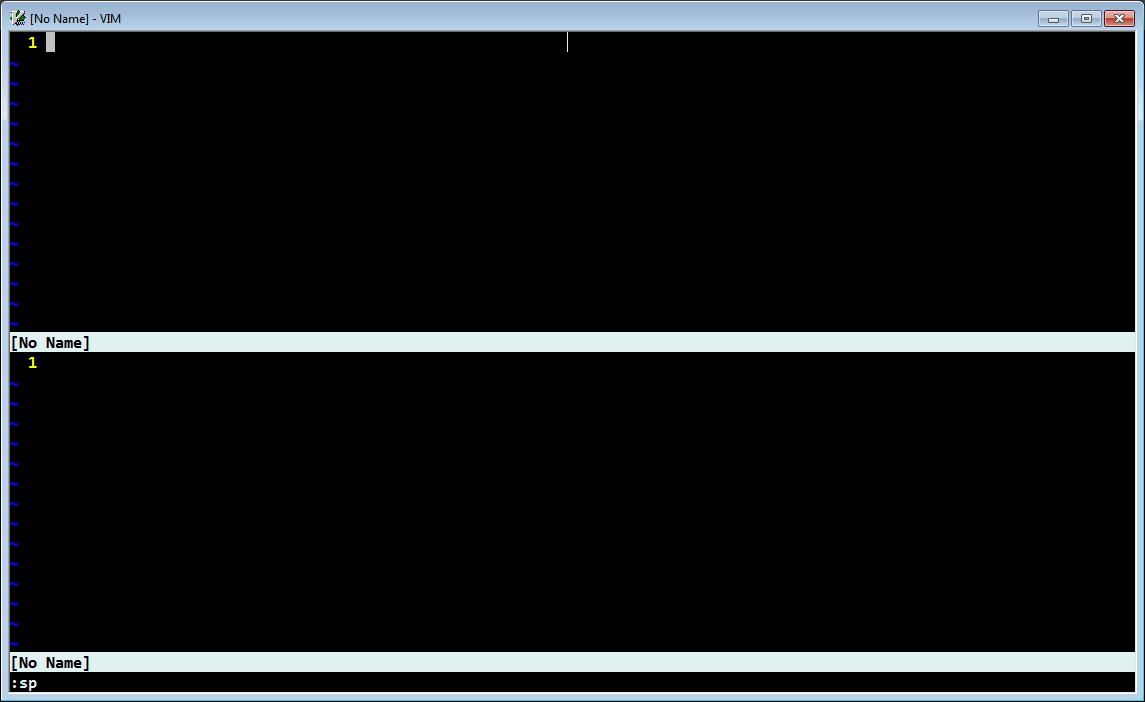
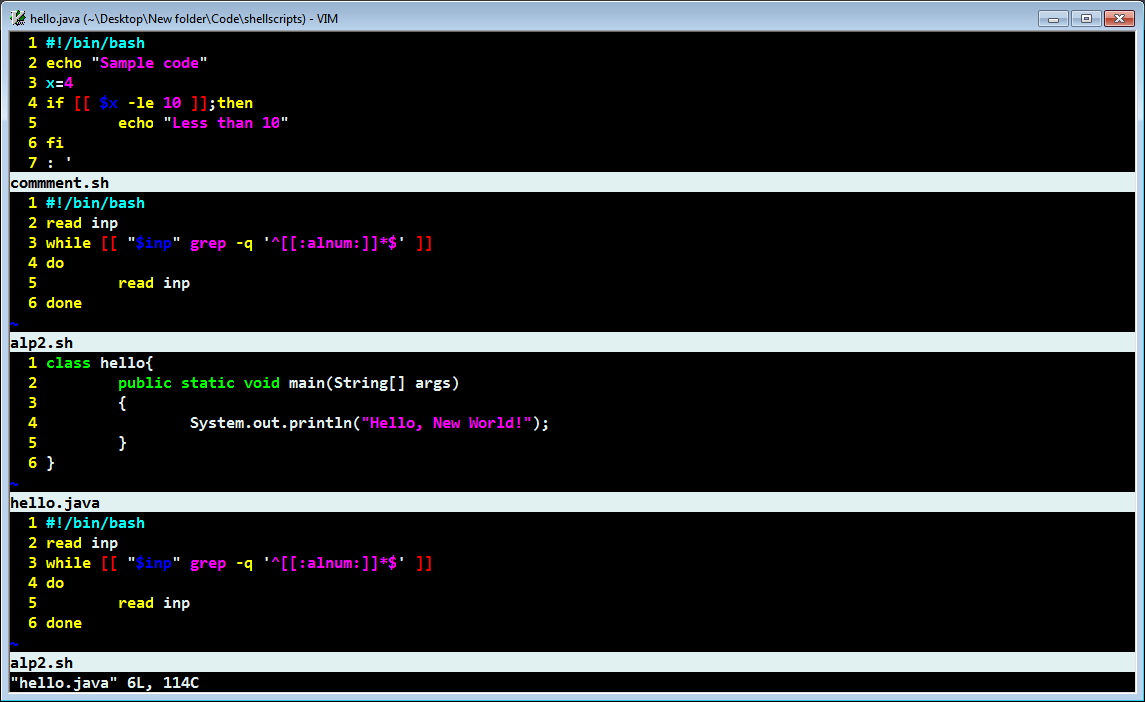
To create a horizontal split, you can use :sp or :split to create a horizontal split of the same file/ blank file. This will create a blank file inside a horizontal split.

Similar to the vertical splits, you can open files by creating the split. You can use the command :sp filename or :split filename to create the horizontal split between the windows and opening a specified file in it.
Again as seen in the vertical split, we can create as many splits as we like. This looks very ugly but who knows when you may need this. We can basically create Splits in any order of vertical or horizontal, we'll see it in the later section to the same.
Vertical and Horizontal Splits Together
We can also create Vertical split and horizontal splits independently like we are not restricted to only creating the only kinds of splits at a time. You can create a vertical split once and then can create a horizontal split within the vertical split created, in this way we can make good use of both the splits as per our needs.
Moving around Splits
Now let's talk about the navigation around these splits, it's again a simple thing. We can use Ctrl+w as our primary command along with Vim navigation to move around the splits. Like for example Ctrl + w + h will take you to the left split to your current open window. You can also use Ctrl+w twice to hop around to the next window split in a repeating loop.
So, we can use:
Ctrl + w+ w -> Switch to the next split (in the order of creation of those splits).
Ctrl + w + h -> Move to the left split.
Ctrl + w + l -> Move to the right split.
Ctrl + w + j -> Move to the below split.
Ctrl + w + k -> Move to a upper split.
These commands might be good enough to pull you through any splits from anywhere, it just becomes easy to use Vim navigation inside of these. You can use arrow keys if you are stuck somewhere but using Vim key bindings will work out of the box.
Creating Splits using Keyboard shortcuts
If you think you are wasting time going into the command mode and typing the commands to create splits, well there are some shortcuts for you.
Ctrl + w + v -> Create a vertical split.
Ctrl + w+ s -> Create a horizontal split.
This will open the split with the current file in the original window, so if you need to change the file, you can use the edit command (:e filename) inside the split.
Rearranging the Window Splits
If you have a specific set of splits of a kind open, you can rotate between those. Like for example, if we have a horizontal split, you can rotate the split to move the upper split down and below split up.
From the above illustration, we can see we rotated(swapped) the splits. We can also use certain commands to arrange the splits into appropriate positions according to the user.
Ctrl + w + r -> Swap the two splits(either horizontal or vertical)
Ctrl + w + H -> Move the split to the left ( Ctrl + w + Shift + h).
Ctrl + w + J -> Move the split down ( Ctrl + w + Shift + j).
Ctrl + w + K -> Move the split up ( Ctrl + w + Shift + k). .
Ctrl + w + L -> Move the split to the right ( Ctrl + w + Shift + l).
We can see that we were able to swap the splits to a location suitable according to our wish. We can definitely switch the splits internally as well.
We can resize the splits as per the requirement and remove the equality in those splits. We have a couple of options to do this:
Ctrl +w + + -> Increase the height of the current split.
Ctrl +w + - -> Decrease the height of the current split.
Ctrl +w + > -> Increase the width of the current split.
Ctrl +w + < -> Decrease the width of the current split.
Ctrl +w + = -> Make the splits equal in width and height.
We can also use :resize {number} to manually set the size of the horizontal split and :vertical resize {number} to manually set the size of the vertical split. This is really risky, like if you know what you are doing then it's totally fine. The commands demonstrated earlier are really adjustable and user-friendly.
We can also use Ctrl + w + _ to minimize all the window split except the current one.
Closing the Splits
Now after doing all sorts of wizardry with the window splits the finishing touch is to close those splits after use. We can surely use :q to close the current window split but that is not intuitive to enter each split and manually close all of them, we can use:
Ctrl +w + c -> Close the current split.
Ctrl +w + o -> Quit all other splits except the current one.
Conclusion
So, we have seen the basics of using Window Splits in Vim. Please let me know if there is some important point that is missing. Thank you for reading through here. We have seen how to create, navigate, rearrange, closing and other basic stuff related to Window splits in Vim.
References:
Hopefully, this might have given you some good idea to deal with Vim in windows splits. Happy Coding and Viming :)


