Vim: NERDTree
Customizing the NERDTree plugin in Vim for enhancing file management and navigation.
Table of contents
Introduction
NERDTree is a great plugin in Vim for managing and navigating Files. Some might prefer fzf, telescope, and other plugins for navigation, NERDTree is not a bad option to begin within Vim. NERDTree allows you to even create/delete/move files and folders flawlessly without much effort, so it becomes a much more viable beginner's plugin.
Installing NERDTree Plugin
So, let's start with the Installation of the NERDTree Plugin, it's quite straightforward and simple.
You should have a Plugin-Manager for installing this plugin. It's not mandatory to have one but it becomes much easier to work with. You can choose any between Vundle, Vim-Plug, Pathogen to name a few. It does not really matter with what you use just stick to one but if you are stuck somewhere just switch and it's not a big trouble to use other Plugin Managers as they are quite similar to each other.
Vundle
To install a plugin using Vundle, you need to configure Vundle first if you have not already done it. You can find the installation docs here.
After Vundle has been configured in your vimrc you can simply add Plugin 'preservim/nerdtree' between the call begin and end of Vundle, like :
call vundle#begin()
  Plugin 'preservim/nerdtree'
call vundle#end()
All of your other Plugins will go in between those two statements, i.e. call vundle#begin() and call vundle#end().
After saving and sourcing the vimrc file, you need to install the plugin using the command :PluginInstall, and there you are all Done!
Vim-Plug
To install a plugin using the Vim-Plug manager, you need to configure Vim-Plug if you have not already configured it in your vimrc. You can find the installation docs at the GitHub README of Vim-Plug.
After Vim-Plug has been configured in your vimrc you can simply add Plug 'preservim/nerdtree' between the call plug begin and end statements. Just like:
call plug#begin()
  Plug 'preservim/nerdtree'
call plug#end()
All of your other Plugins will go in between those two statements, i.e. call plug#begin() and call plug#end().
After saving and sourcing your vimrc file, you need to now install those plugins using the command :PlugInstall, and that is it!
Pathogen
To install any plugin using Pathogen plugin manager, you need to configure PAthogen in your vimrc if you have not done it already. You can find the installation docs on Pathogen.vim. After Pathogen has been configured in your vimrc, you can clone the git repository of that plugin into your local machine and then activate it using Pathogen.
git clone https://github.com/preservim/nerdtree.git ~/.vim/bundle/nerdtree
After cloning the repository, you can add this to your vimrc where you have configured it. It's a kind of DIY manager in terms of managing the folders of the plugin.
call pathogen#infect()
syntax on
filetype plugin indent on
After this, you need to run this command to get docs and help with the plugins,
:helptags ~/.vim/bundle/nerdtree/doc/ or :helptags
And there you are done with the plugin installed.
There are other Plugin managers as well, but these three are the most widely supported ones and they work out of the box, surely explore for yourself and find the perfect one for you.
Activating and Using NERDTree
Now, we actually need to use NERDTree, for that we can type in :NERDTree in any folder in our local machine, and there should be a window open a vertical split to the left, just like this:

After this, you can use that is CTRL+W twice twice to switch back and forth between windows. You can also use CTRL+W and HJKL to move in directions in the windows. For further guides and key-bindings in Window-Splits, you can read my article here.
Now, you can navigate to the file/folders using HJKL or arrows keys(not preferred). You can even use the numbers before the HJKL to jump and hop around the large codebases, this integrates really well with base Vim key-bindings.
You can quiet the NERDTree window by just pressing q or :q, definitely the former is efficient. You can open/collapse the folders also using the enter key to open the file in the current buffer. But hey that's quite limited, what have you ever seen!
Open File in Splits
You can open a file in a horizontal split using the key i on the file. You can open a file in Vertical split using the s key keeping the current highlight in NERDTree on the file which you would like to open. This can be really a great feature to have while opening multiple files and file structures.
Managing Files/Folders using NERDTree
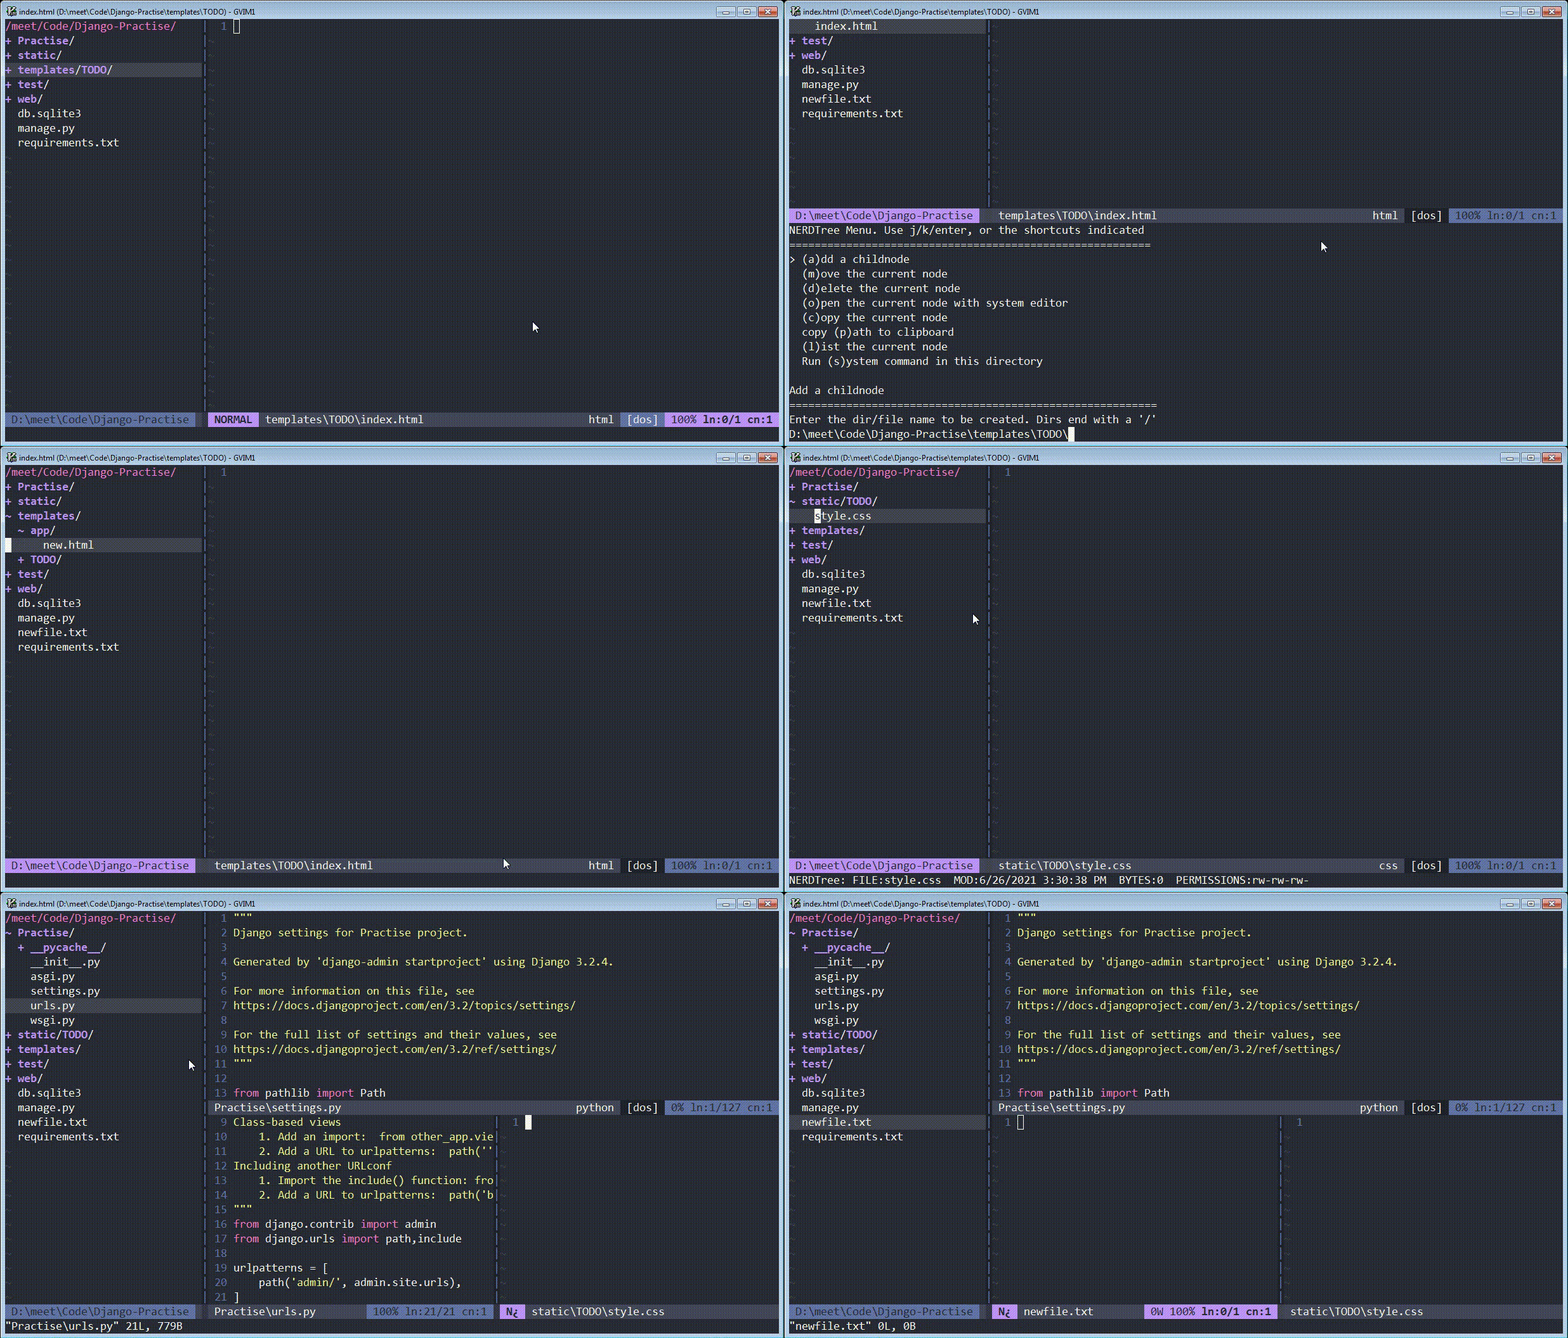
You can create files using the NERDTree window by pressing m inside the particular folder where you want to. If you want to create a file in the root folder, you can go to the topmost file location and press m inside the NERDTree window. If you press m, you will be able to see different kinds of options namely:
Add a child node.(
a)We can create a file or a folder using the key
aor simplyEnterto create the file in the current highlighted location.Move the Current Node. (
m)We can create a file or a folder using the key
aor simplyEnterto create the file in the current highlighted location.Delete the current Node. (
d)We can move the currently highlighted file/folder to any other directory using the file manager itself.
Open the current Node in the system Text-Editor.(
o)We can delete the file/folder which is currently selected on the NERDTree menu.
Copy the current Node. (
c)We can open the file in the system-default text-editor using the key
o.Copy the Path to the clipboard.(
p)We can copy the current file/folder or a node using the command
c.List the Current Node. (
l)We can list the file/folder i.e to display its properties the read/write/execute permissions, date modified and created, etc.
Run system COmmand in this folder. (
s)We can run system commands or shell/terminal commands using the key
s, For windows, we open the COMMAND PROMPT, and in Linux and macOS, it is terminal.
You can quit that window by pressing Esc.
Here is some of the Screencast of me demonstrating the NERDTree plugin features and the edit options.

This is just self-explanatory and beginner-friendly sets of commands, it becomes really easy to do this with some custom macros as we'll talk about in the next sections.
Macros to open file tree
You can make a key-binding to open the NERDTree,
nnoremap <C-n> :NERDTree<CR>
You can map anything instead of <C-n>, most people use <leader> but it's easy to use CTRL+N for me, it's just personal preference.
If you do not like to open NERDTree again and again, you can keep it open whatsoever using the custom key-binding in your vimrc.
autocmd VimEnter * NERDTree
This will open the NERDTree automatically for you when you open Vim, Ya I get it, it's not needed every time but most of the time a developer is switching between the files.
Enabling Autoreload
We can auto-reload the NERDTree window when there is a change in the file structure, i.e. a file/folder is deleted/created/moved/etc. We again need to set this in our vimrc:
autocmd BufEnter NERD_tree_* | execute 'normal R'
au CursorHold * if exists("t:NerdTreeBufName") | call <SNR>15_refreshRoot() | endif
This will reload the NERDTree when the cursor is in the NERDTree's window. This could be really time-saving and a nice quick configuration to enhance the efficiency of your Text-editing.
Enabling Autorefresh for change in the current directory
We can also reload the NERDTree when we change the directory. The above-mentioned command is not sufficient to do that, we have to add another set of configurations.
augroup DIRCHANGE
    au!
    autocmd DirChanged global :NERDTreeCWD
augroup END
By adding this to your vimrc, you will refresh the NERDTree every time you enter or change the current directory. This is also a great addition to have to save time by reloading the Window for every change in the path, if you are looking for something among a huge code-base, this works a charm.
Auto close
You need to close the NERDTree manually each time you want to exit out of it, but this can also be automated just for the sake of simplicity and effectiveness in QUITTING VIM.
autocmd bufenter * if (winnr("$") == 1 && exists("b:NERDTree") && b:NERDTree.isTabTree()) | q | endif
This will close the NERDTree window if it is the only open window. That can be frustrating at moments but the majority of the time this is a great addon indeed.
Packing it together
So, we have learned the basics of using and modifying NERDTree according to our needs, to put it together, you can use this snippet directly into your vimrc and enjoy the flawless experience.
" Open nerdtree window on opening Vim
autocmd VimEnter * NERDTree

" Refresh the current folder if any changes
autocmd BufEnter NERD_tree_* | execute 'normal R'
au CursorHold * if exists("t:NerdTreeBufName") | call <SNR>15_refreshRoot() | endif

"Reload the window if directory is changed
augroup DIRCHANGE
    au!
    autocmd DirChanged global :NERDTreeCWD
augroup END

"Close nerdtree automatically if it is theonly window open
autocmd bufenter * if (winnr("$") == 1 && exists("b:NERDTree") && b:NERDTree.isTabTree()) | q | endif
You can surely add in your custom mappings and enhancement to the NERDTree base plugin. This was just a beginner guide in using NERDTree in a better and efficient way.
Conclusion:
So, We were able to make Vim a better place to work with. Making it easier to navigate along with files and folders. Configuring the NERDTree Plugin, customizing the look and functionality of Vim as per the needs. NERDTree is a great plugin no matter how you use it. It makes Vim more viable as a text editor for daily use and that also in an efficient and clean way. Surely there might be other plugins that are super powerful and blazing fast, NERDTree provides a good UI as well by providing a graphical representation of the File structure that enhances its usage. That is what Vim is about, learning every day some things to change the way to edit. Thank you for reading. Happy Viming and Coding :)
